Laser Cutting
Laser Cutter Maintenance: Guide and Checklist for Maintaining Laser Cutting Machine

Just like any machine tool, a laser cutter needs care if you want it to keep performing at its best. We’ve seen it time and time again: great machines brought down by small, avoidable issues, dust-clogged fans, fogged-up lenses, coolant that’s way past its prime.
The truth? Most laser cutting failures don’t come out of nowhere. They come from skipped maintenance.
You don’t need hours to stay ahead of problems. Just a few minutes a day, wiping the laser bed, checking the airflow, keeping optics clear, can save you thousands in repairs and missed deadlines. After all, your laser system is likely a five-figure investment. Taking care of it protects both your money and the quality of every cut you make.
In this article, we’ll focus on how you can keep your laser cutter running like new, with simple routines, smart habits, and zero guesswork.
Does a Laser Cutter Need Maintenance?
Yes, every laser cutting machine, CO₂, fiber, or crystal requires scheduled maintenance to remain functional. Despite their advanced engineering, no model is truly free of upkeep. You’ll find that even the best systems degrade quickly if left unchecked.
The main causes of laser system failures are surprisingly predictable. Dirt on the optics alone can reduce the laser beam’s intensity by up to 30%.
When misalignment occurs, your precision cutting deteriorates, and material waste climbs. Worse still, a neglected cooling system causes the laser tube to overheat, potentially cutting its lifespan in half. These are not rare events; they’re common issues seen across many production environments.
And while some laser systems come with fully enclosed electronics, you still need to manage surface dust. Tiny particles can migrate through ventilation slots, contaminating sensitive components. That means external cleaning isn’t optional, it’s your first line of defense.
Skipping coolant changes is another costly oversight. Factory data confirms that ignoring a single 3-week coolant interval under heavy use can lead to white scale buildup inside the coolant circuit. Once that happens, the entire system is at risk. What begins as a small oversight can end in total tube failure, often costing several thousand dollars in repairs.
The good news is that these problems are easy to prevent. With only a few minutes of maintenance tasks per shift, you avoid extended downtime, preserve functionality, and get the most out of your equipment. Your maintenance schedule doesn’t have to be complex, it just needs to be consistent.
Why Is It Essential to Maintain Your Laser Cutter?
If you’re serious about keeping your production on track, regular laser cutter maintenance should be a core part of your workflow. It’s the difference between steady output and unexpected breakdowns that drain both time and money.
Start with performance. Daily lens cleaning keeps optical clarity high, allowing your laser beam to cut cleanly and precisely. This alone ensures your tolerances stay within ±0.1 mm—critical for any application where detail matters. If debris builds up on the lens, it doesn’t just reduce beam intensity, it can fuse onto the glass, permanently damaging it. A lens replacement may cost $80, while a cracked laser tube from heat buildup can surpass $4,000 in repair costs.
From a longevity standpoint, scheduled cleaning and alignment stretch your laser machine’s usable life well beyond the standard 8 to 10 years. A solid maintenance checklist reduces friction on moving parts, ensures even wear, and cuts down on energy consumption. For example, greasing rails prevents stick-slip motion, which otherwise heats bearings by more than 10 °C, leading to early wear on motors and belts.
Safety also plays a role. A poorly maintained exhaust system can allow fumes and smoke to back up into your laser bed. If left unchecked, this increases exposure to airborne particulates, potentially exceeding OSHA’s limit of 5 mg/m³. Maintaining the impeller fan and filtration elements reduces that risk while preserving indoor air quality.
Financially, the benefits add up. Clean optics let you operate at lower power settings, saving energy and reducing the load on your power supply. Lubrication minimizes friction losses. Consistent inspections help you identify issues before they escalate into full-scale breakdowns.
How Do You Maintain a Laser Cutter?
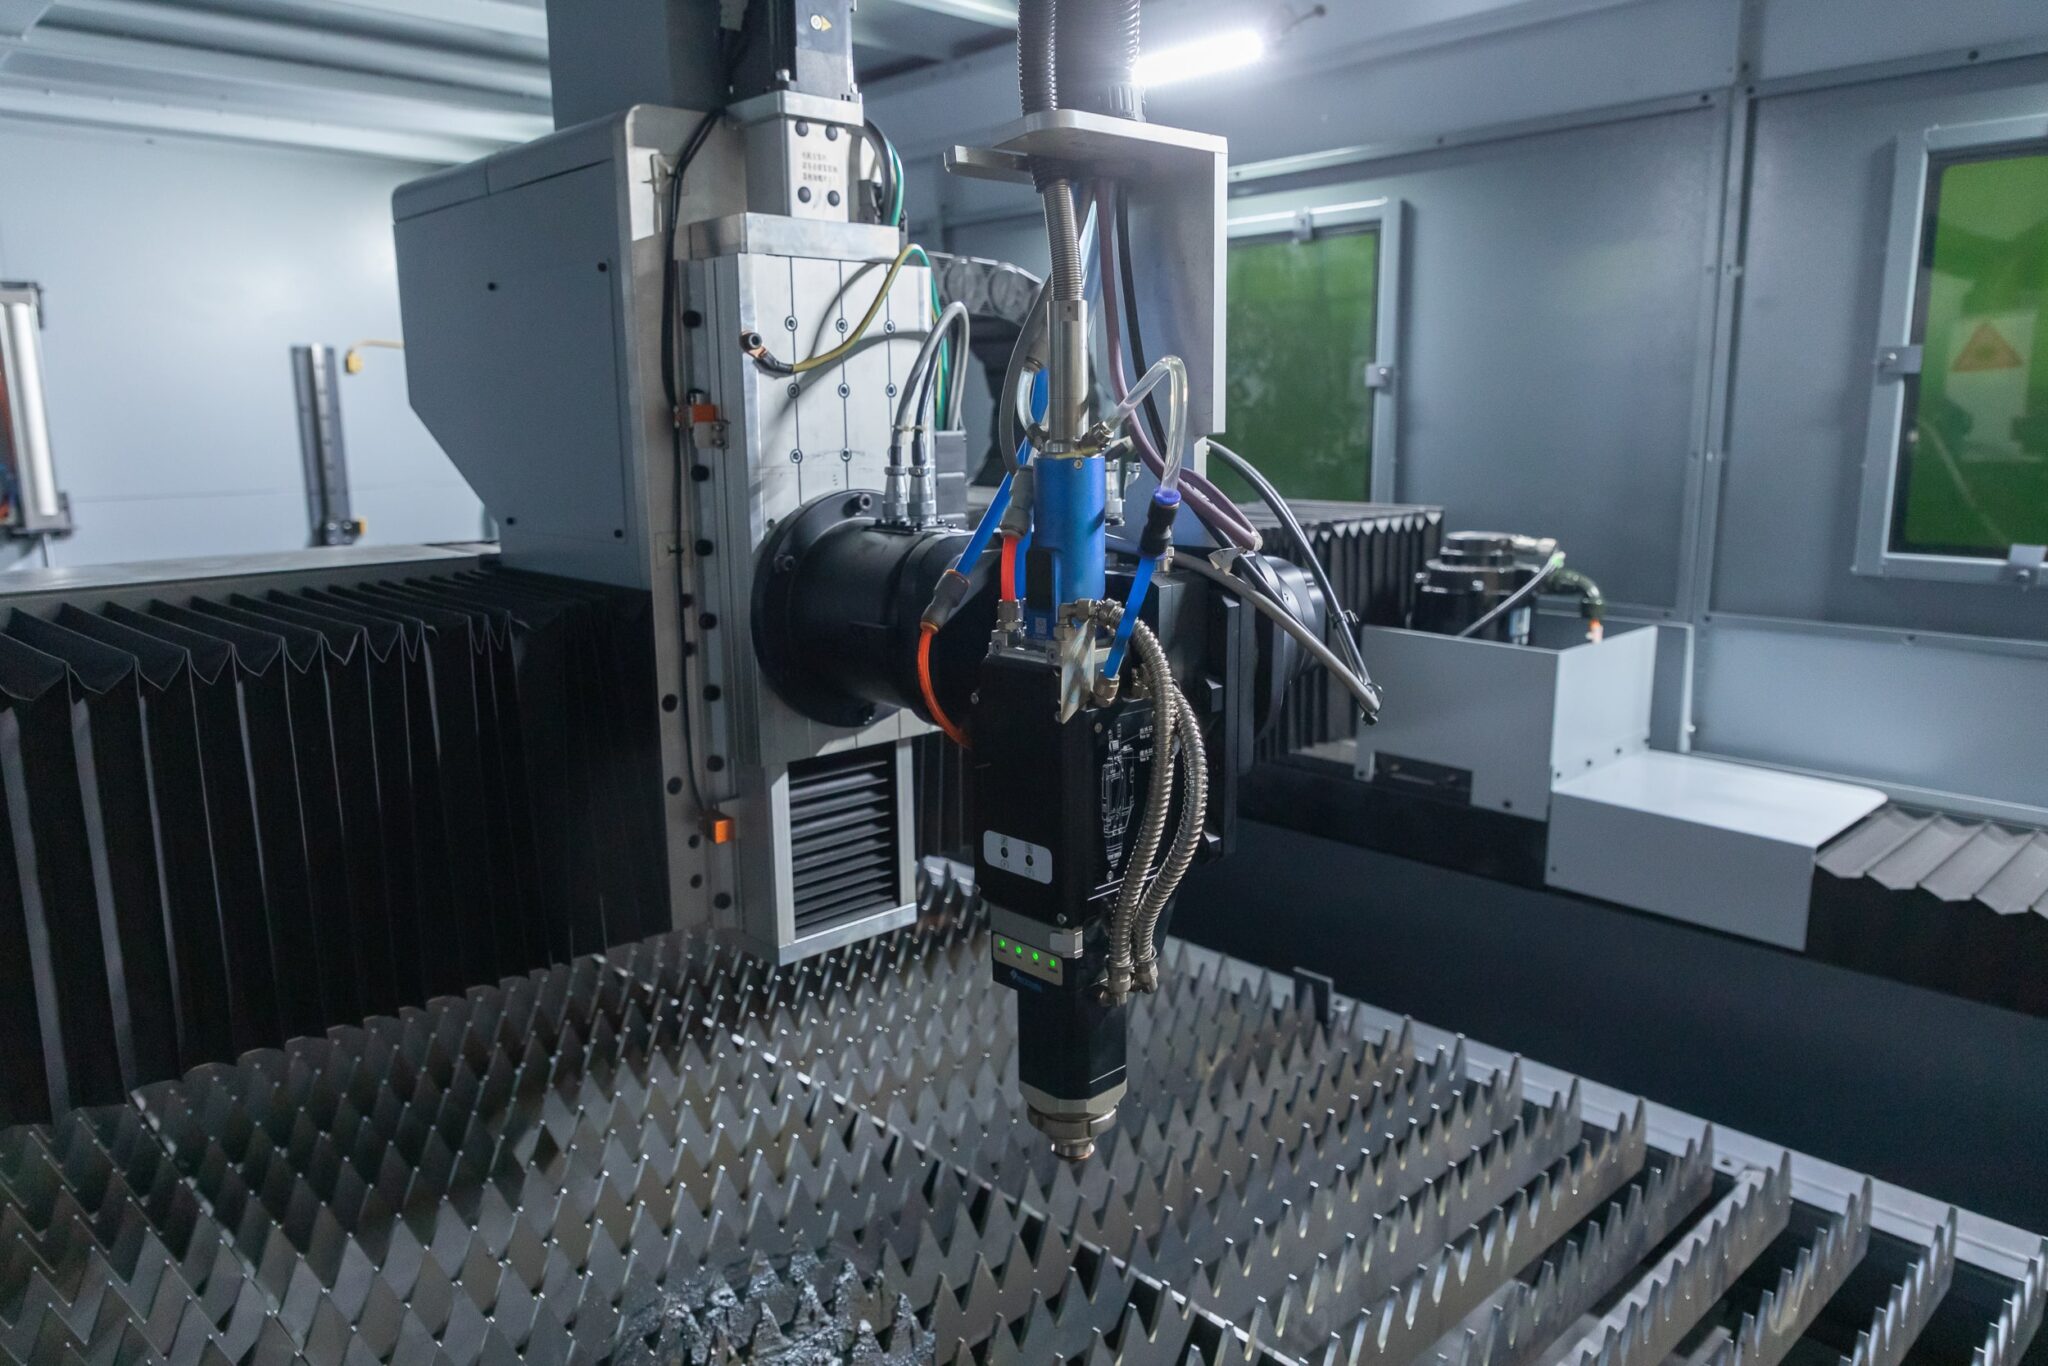
Effective laser cutter maintenance covers several key areas that work together to preserve optimal performance. These include cleaning, lubrication, inspection, alignment and calibration, coolant and gas management, firmware updates, and accurate record-keeping.
You can think of this as a layered process. Each stage plays a role in preventing performance issues, system failures, or even safety hazards:
- Cleaning removes smoke and dust buildup from the laser bed and optics, preserving the laser beam’s intensity.
- Lubricating the rails reduces mechanical friction and keeps cutting speeds stable.
- Routine inspections catch minor wear before it becomes serious.
- Alignments and calibration keep the laser focused correctly on the material surface. And keeping your cooling system clean ensures the laser tube doesn’t overheat, a common reason for early failures.
Following the manufacturer’s hour-based maintenance schedule is non-negotiable. For example, racks should be lubricated every 500 hours, the auto-lube pump refilled every 14 days, and oil changed every six months. These intervals reflect tested tolerances and material flow under typical production loads.
If you’re operating under high-duty cycles or cutting smoke-heavy materials like wood, you’ll need to perform deeper maintenance more frequently. Dust, debris, and resin can accelerate buildup on optics and exhaust system filters. This is where a simplified field routine comes in handy.
A five-step daily checklist covers roughly 90% of what you’ll need:
- Wipe the machine exterior – focus on sheet metal, control panels, and fume outlets.
- Clean optics – use cotton buds and denatured alcohol to wipe mirrors and lenses.
- Lubricate rails – a few drops of oil prevent heat-induced rail wear and friction.
- Refresh coolant – monitor level and clarity to avoid scale buildup in the coolant circuit.
- Check software – ensure firmware is up to date and error logs are reviewed.
What Is the Key Component of Laser Cutter Maintenance?
Among all the laser machine maintenance tasks, none have a greater impact on system performance than optic care.
Your laser’s mirrors and lenses guide and focus the laser beam. If even a fingerprint smudge is left on the surface, it can absorb 10% or more of the beam’s energy, enough to reduce cutting effectiveness, distort beam shape, or cause material scorching.
You should inspect all three mirrors and the focal lens before and after every full production shift. Use lens tissue and denatured alcohol to remove haze, burn marks, or dust. If you see any cracks or heat spots, replace the damaged part immediately.
Damaged optics lead directly to power losses, overheating, and eventual failure of the laser tube.
Cooling comes next in priority. The cooling system ensures that the laser tube operates within the safe range of 19–22 °C. Temperature readings above 25 °C indicate a problem, either with water flow, air exchange, or insulation around the chiller.
For CO₂ laser systems, replace the distilled water every 2 to 3 weeks during heavy use. This avoids mineral scale forming in the coolant circuit, which can cause overheating or tube cracking.
Rail lubrication is the third key element. Dry rails introduce vibration into the motion system, which lowers cutting precision and increases wear on belts and motors. Adding just a few drops of light machine oil every 500 hours prevents friction, overheating, and surface drag.
Focusing on these three areas, optics, cooling, and rail lubrication sets a strong foundation for peak performance. But the question remains: how often should you perform these and other maintenance tasks? That’s where understanding your maintenance intervals makes all the difference.
What are the Core Maintenance Intervals?
Staying on top of your laser cutter maintenance schedule means understanding which tasks are needed daily, weekly, monthly, or annually. When you space them out correctly, you minimize unplanned downtime, extend machine lifespan, and maintain production reliability.
Here’s how to break it down:
Daily Maintenance:
- Wipe down the machine exterior and clear debris from the laser bed.
- Check coolant level and temperature in the chiller.
- Inspect optics for dirt or smudges and clean if needed.
- Monitor airflow at the exhaust system’s vent.
- Scan hoses and belts for visible wear or damage.
Weekly Maintenance:
- Deep-clean mirrors and focal lenses using approved solvents.
- Verify laser beam output with a power meter.
- Remove and inspect air filters; replace if airflow drops.
- Review system error logs via the control software.
Monthly Maintenance:
- Inspect the chiller and water system for algae or discoloration.
- Flush exhaust ducting and clean out any buildup inside extraction hoses.
- Tighten electrical terminals and check grounding lugs for corrosion.
Bi‑Monthly Tasks:
- Clean the cooling unit’s filter screen.
- Remove debris from square-tube vents along the frame structure.
Quarterly (or every 500 hours):
- Lubricate X/Y axis racks and gears with rail‑safe grease.
- Drain the auto-lube pump reservoir, refill, and purge lines.
Annual (or every 1,000 hours):
- Replace the cutting-air filter element and flush the coolant system.
- Perform a full alignment audit and geometric calibration of your motion axes.
Which Tasks Should You Perform Daily?

To maintain consistent performance and avoid unnecessary downtime, your daily laser cutter maintenance routine should focus on cleanliness, inspection, and system checks.
These quick tasks, when completed before or after each job, preserve the laser cutting machine’s functionality and extend its lifespan significantly.
Start by visually inspecting the machine. Look for loose screws, cracked hoses, or worn drive belts that could disrupt your cutting process. Mechanical wear often starts small but leads to serious system failures if ignored.
Next, perform a low-power pulse test to verify laser beam alignment. Misalignment impacts precision cutting and reduces the effectiveness of the optics.
Check the coolant temperature and make sure it’s within the safe range. If it’s below the fill line, top it up with distilled water. This prevents overheating of the laser tube and supports efficient heat transfer inside the cooling system.
Also, brush any debris off the dust-resistant cloths that shield the X and Y axes, and empty the slag drawers to ensure unobstructed movement during operation.
Before powering up, vacuum the laser bed to remove buildup. After that, wipe the surface with a lint-free cloth lightly moistened with acetone or alcohol.
Avoid pouring solvents directly onto the bed, they can ignite if exposed to a residual spark. Once the cleaning is complete, power-cycle the fan unit and listen for airflow strength. A noticeable drop may signal a blocked exhaust system or a failing impeller fan.
You should also clean the lens both before and after every job, especially if you’re cutting wood, acrylic, or other smoky materials.
These materials produce vaporized resin and smoke, which tend to accumulate on the lens and scatter the laser beam. Daily attention to the optics ensures the laser operates at full power and keeps maintenance issues from escalating.
To complete your checklist, place your hand near the extraction hose vent and verify strong suction. Weak airflow is a red flag for duct blockage or filter saturation.
Clean the Machine’s Exterior
Keeping the outer surfaces of your laser cutter clean isn’t just about appearance—it plays a critical role in long-term machine maintenance.
Dust and grease left on the machine’s skin can migrate through ventilation openings and settle on internal electronics, contributing to corrosion and electrical issues inside the machine cabinet.
To clean properly, use lint-free cloths dampened with mild detergent. Wipe down the control panel edges, door handles, and sheet-metal panels.
Avoid alcohol-based cleaners on painted surfaces, as they can strip coatings or leave streaks that attract even more dust.
Special attention should go to the viewing windows. If grease builds up here, it traps airborne particles from smoke and resin during the engraving process. This buildup not only affects visibility but also degrades the cleanliness of the internal environment by allowing dirt to recirculate.
Check the Working Table or Honeycomb Bed
Your laser bed or honeycomb support structure is one of the most exposed parts of the machine and one of the easiest to overlook. Daily cleaning helps maintain airflow during cutting and prevents flare-ups caused by material accumulation.
Start by vacuuming between the grid fins.
Use a soft brush attachment to dislodge slag, resin droplets, or leftover cuttings that have fallen between the supports.
Blocked airflow in this area can cause the temperature of parts on the bed to rise by over 60 °C, increasing fire risk and warping the material surface.
Re-level the bed using a straightedge. Even a 0.5 mm warp can affect focus and cutting depth, which leads to inconsistent results.
You should also inspect the tray for leftover scraps that could ignite during the next cycle. Scrape or vacuum these after every shift.
For deeper cleaning, soak the honeycomb grid overnight in warm water. Use plain water for wood-cutting residues, and add a mild detergent for plastics or oily materials. In cases of heavy tar accumulation, you can pressure-wash the bed to restore full airflow and surface cleanliness.
Inspect the Laser Head and Optics
The laser head is where performance meets vulnerability. Any dirt, haze, or micro-scratches on your mirrors or lenses can disrupt the laser beam and reduce cutting effectiveness.
That’s why you should inspect the optics before and after every shift.
Begin by checking the surface of each mirror and the focal lens. Look for haze, burn marks, or dust.
Use approved solutions like Eclipse® cleaning fluid or HPLC-grade methanol, and avoid touching the glass with your fingers, body oils can permanently mark the surface or lead to hot spots.
Always clean using lens tissue and wipe in a single direction. This prevents streaks and reduces the chance of abrasive damage from debris. If any lens shows pits or cracks, replace it immediately. Even small defects can scatter the beam, leading to overheating or focused energy loss inside the laser tube.
Which Tasks Should You Perform Weekly?
Start your week by measuring the laser beam output using a calibrated power meter. If the output deviates more than 10% from your baseline, it’s time to recalibrate or realign. Output loss usually means the beam is being scattered, likely by dirt on the mirrors or lens, or misdirected due to mirror drift.
Next, clean the air assist compressor filter. Clogged filters restrict airflow, and without proper air assist, your cuts may show burn marks or rough edges. Restoring full airflow ensures clean edges and protects the laser lens from debris carried by smoke or vapor.
Inspect your linear rails and runners for dry spots. A few drops of 32# guide oil go a long way in reducing friction and extending part life.
Just don’t overdo it, excess grease traps dust and creates build-up along the axis rails. Lubricating the X and Y axes every two weeks with about 0.1 ml of grease per side will prevent stick-slip motion and vibration during high-speed engraving.
Turn your attention to the extraction system. Soot accumulation in the ducts and impeller fan blades can cause airflow to drop and fume buildup to increase inside the machine cabinet.
Clear out the ducts using a flexible brush and remove any hardened soot from the fan blades. If your fan unit shows signs of reduced intensity, check for obstructions in the extraction hoses or buildup in the filter housing.
Also, test focus distance. Engrave thin test lines at different Z-heights and look for the sharpest result, on many hobby-level CO₂ lasers, it’s around 6 mm. This ensures that your focal point is aligned with the material surface, delivering clean, deep cuts at the right speed.
Finally, inspect chiller filters and radiator fins. Dust can restrict airflow through the cooling system, pushing coolant temperatures into unsafe ranges. Use a soft brush or compressed air to clear buildup.
Inspect and Clean Air Assist Nozzle
The air assist nozzle plays a quiet but vital role in your laser cutting process. It keeps the cut path clear of debris, prevents flare-ups, and protects your optics by keeping fumes from rising toward the lens.
Over time, resin, dust, and carbon buildup restrict this nozzle’s airflow, weakening performance and introducing quality issues.
Start by powering down your machine and detaching the nozzle. Use a soft brush to remove any resin accumulation, or soak it in warm, soapy water for tougher buildup. Be gentle, aggressive scrubbing can deform the nozzle opening and alter airflow direction.
Once clean, reattach the nozzle and check for airflow by turning on the air assist compressor and placing your hand near the tip. You should feel a strong, consistent stream. A blocked or weakened flow affects both cutting speed and edge finish.
Clean and Check Mirrors Thoroughly
Weekly mirror care protects one of the most critical subsystems of your laser cutter—your optics. If mirrors are even slightly dirty, you’ll lose beam intensity and experience irregular focus, especially at higher cutting speeds. That’s why a dedicated mirror cleaning session is part of every complete laser machine maintenance checklist.
Start by wearing nitrile gloves to avoid introducing skin oils. Remove the mirrors one by one.
Fog each mirror with your breath to reveal dust or residues, then gently wipe in a single direction using lens tissue soaked in reagent-grade acetone. Avoid circular motions—they tend to smear debris or introduce micro-scratches.
After wiping, let each mirror air dry fully before reinstallation. Trapped solvent residue can create hot spots on the surface once the laser is active. Before placing the mirrors back in, inspect each one under strong light for clarity and uniform reflectivity.
When kept clean, your mirrors ensure full transmission of laser power through the beam path.
Lens Cleaning and Inspection
The focal lens is one of the most delicate and critical components of your laser cutting machine. Any residue on its surface affects the laser beam’s clarity, reducing intensity and compromising cutting accuracy.
That’s why weekly lens inspection and cleaning should be part of your laser machine maintenance checklist—especially if you’re running frequent or high-powered jobs.
Begin by removing the lens car
efully and inspecting it under a bright light. Look for any haze, micro-burns, or dust particles. Clean the surface using cotton buds or lens tissue soaked in methanol or another approved solvent like Eclipse®. Avoid using general-purpose cleaners or WD‑40, they leave behind oily residues that can bake onto the lens during operation, permanently damaging the surface.
After cleaning, run a dot-burn test to verify that the laser beam still converges at the correct focal point. If the burn appears diffuse or off-center, the lens may require re-seating or realignment.
Lubricate the X/Y Axis Rails
Smooth motion along the X and Y axes is essential for clean engraving paths and sharp cut lines. Without regular lubrication, friction builds up, bearings wear out faster, and cutting speeds drop due to increased motor load.
To keep your motion system at peak performance, you need to lubricate the linear rails and belts on a timed schedule based on machine usage.
Before applying oil, wipe each rail with a lint-free cloth to remove any dust or buildup. Apply 1–2 drops of light machine oil or rail-specific grease every 500 hours of operation. Use just enough to form a light film, excess lubricant attracts dust, which can harden into a grinding paste that damages the rails over time.
Avoid water-displacing sprays or generic lubricants, as they strip protective films and leave the rails vulnerable to corrosion.
Maintain the Exhaust or Fume Extraction System
Your exhaust system does more than remove fumes, it plays a direct role in maintaining safety, airflow balance, and cutting consistency.
If it underperforms due to clogs, dirty filters, or cracked hoses, the laser bed fills with smoke and particles. This not only affects visibility and beam quality but also increases exposure to harmful fumes.
Once a week, remove and clean any pre-filters with water and a mild detergent. Replace HEPA or charcoal filtration elements when pressure drop exceeds 250 Pa, or if airflow becomes noticeably weak.
A clogged filter reduces suction, allowing smoke to linger inside the cutting chamber and contaminate your optics.
Detach the extraction hoses and ducts, then use a long brush or compressed air to dislodge soot and debris. Inspect the hoses for pinholes or cracks—any leaks can reroute smoke back into the machine cabinet or production area.
As a final check, feel for suction at the laser bed opening. If airflow is weak, service the fan unit or inspect the impeller fan for blockage.
Which Tasks Should You Perform Monthly?

You should begin with the cooling system. Check the chiller hoses for algae growth. If you see any discoloration in the water or along the inner hose walls, flush the system immediately.
Dirty coolant not only reduces heat transfer efficiency but also increases the risk of laser tube overheating. If you’re measuring water conductivity, replace it when it exceeds 30 µS/cm, or at least every six months as part of your maintenance schedule.
You should also check the exhaust fan motor amperage. If the reading is more than 15% higher than baseline, it may indicate bearing wear or rotor drag.
Catching this early prevents airflow losses, excessive heat, and motor burnout—issues that directly affect fume extraction and precision cutting outcomes.
Inspect all relay contacts and grounding lugs. Look for signs of pitting, corrosion, or loose connections. Over time, even minor grounding issues can damage sensitive components inside your machine cabinet, especially during voltage fluctuations.
One often overlooked but essential step? Blow out the electronics compartment with compressed air once a month. Dust buildup here can trap heat around circuit boards and power supplies, increasing the risk of overheating and reducing lifespan.
Committing to this monthly checklist is more than just proper maintenance, it’s an investment in your machine’s longevity, your production reliability, and your peace of mind.
Evaluate the Cooling or Chiller System
The cooling system is central to your laser cutter’s thermal stability, and regular inspection ensures the laser tube remains within safe operating temperatures. At least once a month, inspect the chiller water for cloudiness or algae. Flush and replace it immediately if any signs of contamination appear. If you’re in a colder region, maintain a 35–40% propylene-glycol antifreeze mix to prevent freezing.
When it’s time to change the coolant, always shut the chiller off five minutes in advance. This pause allows sediment to settle and prevents it from recirculating through the coolant circuit. After draining, rinse the tank to remove biofilm or mineral residue, then refill with clean distilled or de-ionized water.
Also, check the side-panel filters and radiator fins weekly. Clogged filters can raise coolant temperature by as much as 4 °C, leading to accelerated tube wear and inconsistent beam power.
Gas System Maintenance
The gas system in your laser cutter, especially when working with air assist compressors or dedicated gas lines, must remain clean and balanced to ensure stable cutting speeds and clean edges. Once a month, check all gas lines, pressure regulators, and filter elements for signs of wear, pressure drops, or leaks.
Replace the cutting-air filter element at least once per year, or sooner if you notice a pressure drop exceeding 0.1 MPa. This filter is essential for keeping oil, dust, and moisture out of the delivery hose. If neglected, these contaminants can build up inside the nozzle, degrade cut quality, and reduce optic lifespan.
After cleaning or adjusting the air-assist line, immediately verify pressure at the nozzle. You should feel a strong, steady flow. If the airflow is weak, check for restrictions or misalignment. Maintaining your gas system protects your optics, improves fume evacuation, and reduces rework caused by scorching or edge debris.
Check Electrical Connections and Components
Begin by inspecting all visible cables and connectors inside the machine cabinet. Look for discoloration, frayed insulation, or signs of heat damage near contact points. Next, use a calibrated torque driver to ensure that all terminal screws are secured to the manufacturer’s specified tightness. Loose terminals generate high-resistance spots that can lead to heat buildup, voltage drop, or even arcing—serious hazards that impact both safety and cutting performance.
Moisture control is just as crucial. Keep all power supply units, boards, and cable junctions free from condensation or dust accumulation.
Moisture fosters corrosion on circuit traces and solder joints, especially in humid production environments. Blow out dust with dry compressed air and maintain a dry, climate-controlled cabinet interior.
If your incoming voltage is unstable, fluctuating more than ±5%, consider installing a line conditioner. This stabilizes power input, protecting sensitive electronics from spikes or surges that can degrade laser tube lifespan or compromise laser beam consistency.
By staying proactive with these electrical maintenance tasks, you ensure proper system functionality, reduce the risk of performance issues, and protect your long-term investment in the laser cutting machine.
Which Tasks Should You Perform Annually (or at Longer Intervals)?
Begin with a full geometric calibration. Use measurement tools and software to verify that motion systems return to their original alignment specs. This ensures positional accuracy during high-speed engraving or when working with tight tolerance parts.
Drain and replace the lubricant in the auto-lube reservoir. Clean or replace the oil filter after roughly 1,000 hours of use to keep the lubrication system functioning without contamination.
If you’ve run the machine heavily, these steps become even more important.
The cooling system also needs deep service. Fully replace the chiller water and clean the tank, hoses, and heat exchanger surfaces to remove sediment and prevent buildup that leads to temperature drift or laser tube degradation.
Finally, consider scheduling a visit from a qualified technician. Once a year, having an expert recalibrate optics, check software updates, and inspect high-wear components can help you stay ahead of costly failures and maintain consistent system performance. Professional oversight complements your routine checklist and reinforces reliability across the board.
Perform a Full Machine Inspection
Once per year, carry out a detailed inspection of every key system on your laser cutter. This is more than just a surface-level review, you’re identifying emerging problems before they disrupt your workflow.
Inspect the machine’s motion system for backlash, uneven wear, or alignment issues. Confirm that all sensors are triggering correctly and inspect safety gratings for signs of loosening or cracking. Verify that limit switches are functioning and that firmware is up to date to eliminate known bugs that may affect detection or performance.
Pay particular attention to the electronics and wiring. Look for burnt contacts, unresponsive buttons, or any changes in machine response during startup. A great way to complement this inspection is with annual thermographic scanning.
Schedule Periodic Replacements and Upgrades
The X and Y axis belts typically last around 10,000 hours under normal use, but you may need to replace them sooner if your machine handles heavy loads or long shifts. Inspect these belts for signs of cracking, stretching, or fraying.
Also plan for replacing focus nozzles—especially if you cut stainless steel frequently, as they tend to erode after about 1,500 hours.
Filters in your air assist and exhaust systems lose effectiveness over time. If you notice airflow reduction or increased residue near the laser bed, it’s time to install fresh filter elements. Replacing these regularly prevents smoke buildup and protects your optics.
At the five-year mark, it’s wise to replace high-load components such as coolant pumps and exhaust fan bearings. Doing so before failure prevents shutdowns during critical production periods.
What Does Preventive Laser Cutter Maintenance Involve?

Preventive maintenance helps you stay ahead of breakdowns and avoid costly disruptions. Instead of reacting to problems, you actively reduce risk by keeping the machine in its best condition. This involves routine planning, consistency, and attention to detail.
One effective approach is to schedule downtime—many facilities dedicate an hour each Friday for weekly service.
During this time, you can check for early signs of wear, inspect cooling performance, and clean optics. You should also track vibration, temperature, and laser power output trends. These signals can help identify issues like misalignment or thermal stress before they lead to full system failures.
Document everything you do. Keeping a digital log of filter swaps, lens cleaning, lubrication points, and firmware updates ensures traceability. It’s also critical for warranty claims and supports long-term machine health.
Any time you align the beam path, follow the manual carefully and wear certified eye protection. These steps not only preserve safety, but also ensure accuracy during calibration tasks.
How Do You Create an Effective Maintenance Schedule?
The first step is to match service frequency to your laser cutter’s workload. If you run heavy-duty shifts across multiple operators, you’ll need to shorten intervals between inspections and lubrication cycles.
One simple and effective method is to use a spreadsheet or cloud-based maintenance management tool.
Organize tasks into daily, weekly, monthly, and annual categories. Then, assign due dates and color-code them based on urgency or frequency. These visual cues make it easier for your team to stay on track.
Set reminders for important milestones, like re-lubricating the rails every 500 hours or replacing coolant every six months. These aren’t just arbitrary numbers, they’re based on manufacturer data and real-world testing.
Place a laminated daily checklist near the machine. This helps operators follow a step-by-step routine and sign off each task, which is especially useful for ISO 9001 traceability.
Which Maintenance Areas Are Most Important?
When it comes to maintaining a laser cutting machine, not all components have equal impact on performance or downtime. Some areas carry a much higher risk of system failures, costly repairs, or production delays.
To keep your machine running at peak performance, you need to focus on the systems that directly influence cutting precision, cooling efficiency, and overall reliability.
The most critical systems to monitor include:
- Optics: Mirrors and lenses directly affect beam focus and intensity. Any contamination or misalignment can ruin cutting accuracy.
- Cooling system: Overheating the laser tube due to clogged coolant lines or poor flow can shorten its lifespan or cause complete failure.
- Motion system: Rails, motors, and gearboxes must move smoothly. Backlash or skipped steps can ruin engravings or precision cuts.
- Exhaust system: Blocked or weak airflow raises fire risk and exposes optics to smoke.
- Electrical and gas systems: Damaged connectors, voltage fluctuations, or leaks reduce system stability.
What are the Key Seasonal Maintenance Considerations?
Environmental conditions change with the seasons, and so should your laser cutter maintenance strategy.
Seasonal shifts in humidity, temperature, and airborne contaminants can affect the stability and performance of your laser systems.
During humid months, condensation becomes a real threat. When relative humidity rises above 60%, optics can fog and lose transmission efficiency, so use a dehumidifier to protect critical components like your lens and mirrors.
Heat waves bring another challenge. As the chiller radiators work harder to maintain a stable coolant circuit, they tend to accumulate ambient dust more quickly.
If this dust cakes onto warm fins, airflow drops, and the coolant temperature climbs—potentially triggering system failures or overheating your laser tube.
Cleaning radiator surfaces more frequently in summer is a simple step that can save your entire production cycle.
By adapting your maintenance tasks to seasonal conditions, you ensure peak performance, reduce repair costs, and prevent premature wear on sensitive laser machine components.
Think of it as proactive investment protection, small adjustments to your regular maintenance checklist that preserve both uptime and precision cutting accuracy.
Winter Care Guidelines
Cold weather introduces unique risks that can directly impact the safety and effectiveness of your laser cutting process. When temperatures dip, condensation can form on internal electronics, creating short circuits or corrosion inside the machine cabinet.
To prevent this, always keep your workspace at or above 10 °C (50 °F), with the ideal operating range around 21 °C (70 °F) for consistent material and system response.
One critical aspect of winter maintenance is coolant care. For most CO₂ laser cutters, you’ll want to run a 35–40% propylene-glycol mix to avoid freezing in unheated buildings.
Run the chiller for at least five minutes before each startup. This pre-circulation warms the fluid, helps dissolve any coolant separation, and stabilizes the cooling system before active production begins.
If your site will be left unheated over holidays or long weekends, don’t forget to drain all exterior hoses and fittings. Water expands when frozen, and cracked delivery hoses or valves can shut down your entire laser cutting machine when you least expect it.
Winter also tends to dry out air and reduce natural ventilation, so monitor fumes and airflow more closely through your fan unit. Seasonal maintenance isn’t just about keeping your machine running, it’s about protecting your business from downtime when precision cutting matters most.
Which are the Common Maintenance Pitfalls and How to Avoid Them?
Even with a well-built laser cutting machine, the most common maintenance issues tend to stem from simple human oversight. Ignoring error logs is one of the top culprits. Those red alerts in your control panel aren’t just annoyances, they’re early warnings. If left unresolved, small performance issues can cascade into major laser cutting failures.
Another frequent mistake? Skipping scheduled filter changes. A saturated air assist compressor filter or clogged exhaust system can drastically reduce airflow, leading to poor edge quality and increased fume buildup.
Using the wrong fluids is also a silent killer. Tap water in your cooling system introduces minerals that can block capillaries and overheat the laser tube. And while lubrication is essential, over-lubricating your rails traps dust, forming a paste that grinds down bearings and guideways faster than you’d expect.
To avoid these issues, follow a maintenance schedule that aligns with your laser cutter’s duty cycle. Keep a digital checklist or CMMS log, and inspect optics, coolant, and filtration elements at regular intervals. Stick to manufacturer-approved products, and always account for environmental conditions at your site.
How Can You Choose a Laser System That Is Easier to Maintain?
If you’re still in the selection phase, choosing a laser system with smart design features can make your future maintenance tasks far more manageable.
Look for machines with slide-out optic drawers, tool-less filter access, and integrated auto-lubrication pumps. These time-saving elements can significantly reduce the hands-on time needed for routine upkeep.
Remote service ports and onboard diagnostic dashboards simplify troubleshooting and streamline communication with support teams. Just as important is the support ecosystem: make sure the manufacturer offers accessible spare parts, a clear manual, and responsive after-sales service.
Some laser cutting systems also ship with dedicated cleaning kits, matching solvents, cotton buds, and wipes that prevent material compatibility mistakes. Bonus points if the electronics cabinet is insulated and sealed, which keeps dust off circuit boards and minimizes the need for deep cleaning.
What Additional Safety Measures Should You Consider?
Even with a reliable laser cutting machine and proper maintenance schedule, laser cutting safety should never take a back seat. You need to protect yourself and others in your workspace by practicing rigorous safety protocols.
That starts with the basics, always wear certified laser-safety goggles. If they’re scratched, their optical density is compromised, and that puts your eyes at serious risk. Replace them immediately.
Beyond PPE, incorporate lockout/tagout procedures for service tasks. Powering down isn’t enough, disconnecting from the power supply eliminates the risk of accidental startup. Also, regularly inspect interlock switches and light curtains, which tend to drift out of alignment every few months.
A misaligned sensor won’t stop the laser beam when it should, exposing you to hazards during operation.
Safe operation is about discipline. Don’t bypass safeguards, and never operate your CO₂ laser without confirming your exhaust system is running properly. Trapped fumes and heat build-up can damage components and increase fire risk.
Should You Consider a Professional Service or Technician Support?
There are times when your in-house team can’t catch everything, and that’s when calling in the pros makes sense. Even with daily inspections and careful machine maintenance, some system failures require a trained eye. Certified technicians can recalibrate your laser beam alignment to within ±25 µm—restoring cutting precision after months of heavy use.
When weighing the cost of a service call, consider what’s at stake. Unresolved issues in your cooling system or electrical cabinet can cost far more in repair costs and production downtime. That’s why many shops opt for an annual full-service contract. It typically includes a comprehensive laser machine maintenance checklist, thermographic scanning to spot hidden hot spots, and firmware updates.
Outsourcing maintenance ensures that your machine stays in peak condition, especially if you’re running around the clock. Plus, technicians bring tools and software that aren’t always available to your internal team, like diagnostics for system firmware or air assist compressor calibration.
Conclusion
At the end of the day, keeping your laser cutter in top shape is about making it last longer and getting the kind of results you can count on. We’re talking cleaner cuts, fewer breakdowns, and less time wasted fixing problems that could’ve been prevented.
That’s why we follow a clear maintenance routine, from quick daily checks to annual tune-ups, and you should too. Set reminders, use a checklist, and don’t skip the “boring” stuff like filter changes or software updates. Trust us, these small tasks save you big headaches later.
Think of your laser cutter like your favorite pair of glasses. If it’s dirty or out of alignment, you won’t see clearly. But when everything’s clean, sharp, and in sync, you get precision and consistency, job after job. Maintenance doesn’t just protect your machine, it protects your reputation.