After crossing a significant number of running hours, your bending machine is prone to damage and problems. This is completely unrelated to the quality provided by the manufacturer. Rather, think of it as additional investment into your project, which is sure to result in significant benefits and profits in the long run. Managing these problems at the beginning is definitely better than letting them grow into something that can compromise the work process and quality.
Think simple
Sometimes, the solutions for all your trouble are right in front of your eyes. This is very true in the case of most heavy machinery and even our home appliances. If you encounter any problem with your press brake that you do not completely understand, simply try restarting your machine. Though this might not work every time, it can still save you from a significant amount of time lost on thought and services to check the machine.
You can just keep this method as a final check before making the call to your maintenance or service technicians. All you have to do is switch off your device completely and let it stay that way for a few seconds, draining all the circuits of any power. Then, restart your brake.
Basic measures
As a first and foremost approach, the program already present is tried to be adjusted with an older program. This is a good way to help you understand what is wrong when your machine stops working abruptly when it was apparently fine before a few cycles of work. By switching your machine back to a program that you know was working fine, you avoid unnecessary troubles with device management services.
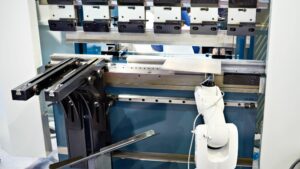
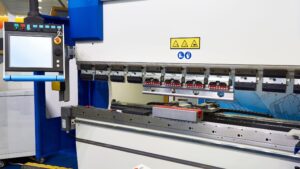
Common problems and troubleshooting methods
There are a few issues that have been reported commonly by the users of Electro servo press brakes but have very simple solutions. Here are a few such examples to help you deal with such minor inconveniences easily.
1. Device fails to start
Sometimes, the press brake machine simply does not switch on at all, without any previous inconvenience or sign of trouble. In this case, you will have to check these basic things.
- The proper open or ON state of the main disconnect switch is pretty basic.
- Check for a blown transformer fuse. Replacing a blown fuse might be a very easy solution.
- Check if there is a tripped central motor thermal overload delay. You can reset this as required.
2. Primary motor overload
The main control of this lies at the thermal overload relay. Thermal overload delay is responsible for protecting your machine from damage due to overload and constraint. Rectify the problem which is causing this overload, and you are good to go.
3. Uneven bending
It should be pretty obvious to you when your machine is not bending perfectly with the usual level of accuracy. You can start by checking the proper alignment of the machine grossly, along with the secure nature of the screws in the shaft. In case of any loose screws, simply tighten them with the appropriate toolkit.
You should also check your machine for any visible damage or signs and extensive wear and tear. Any machine that has worked for a significant time frame can produce inaccurate bending. Make sure to get your machine checked by professionals and replace any parts when required, and do not compromise.
This is important because any compromise you make as far as your machine is concerned will directly reflect on the overall quality and accuracy of your work and bending.
4. When your RAM is not traveling down
Your electro servos press brake should have properly functioning RAM. In the case of a blown transformer fuse, your press brake RAM might not be able to come down. In that case, you will have to check the coil using a voltmeter. If there is no energizing, your coil needs replacement. Otherwise, in the case of energizing without shifting the valve, a service might suffice.
5. When RAM does not return to the top
In this situation, you should check if your device is in the RUN position. Alternatively, you can check for a broken solenoid coil or if the main relief valve is not spaced appropriately.
Your RAM failing to stop at any fixed position is different from both the above conditions. In the former case, the Top-of-stroke limit switch most probably requires replacement.
6. RAM parallelism
An improper setup of the parallels of the RAM might twist the RAM off parallel and damage the tools, along with many other complications. There are many steps that are useful in keeping good parallelism in your device.
- Make a few uniformly sized metal squares out of a suitable thickness.
- Put one of those in from each end of the lower die along with the grain, while the material is going the same direction on the metal cut out.
- Put the machine in JOG. Then take the RAM down to lower levels and crank down the lower limits as you hold the down button. Carry on with this until the sheet metal coupons are bent approximately at 45 degrees Fahrenheit.
- Then, allow your RAM to back up and then insert two new sheets.
- Bring the RAM down to stops.
- Slide the metal sheets and compare their bending. The overall objective is to have the pieces of sheet metal with an equal bend. A good way to measure this bend is with the help of a micrometer.
- You can easily make any future adjustments and changes to the micrometer with the help of the right side, while you touch up the other side with simple spray paint.
7. RAM Timing
After a proper setup of parallelism, you will have to correct the timing of your RAM appropriately. You should ensure that the RAM on both sides is operating and descending at a uniform pace. This is a simple task, done with the following steps.
- Put your machine in the RUN position.
- Without taking your eyes off the indicator lights on the back of the control box, cycle your machine twice or thrice. Check for the time when both lights blink simultaneously. This is indicative of proper timing and synchronization.
- If the above was not exhibited, try adjusting or loosening your lock nuts and knobs.
- Put both the adjustment knobs to stops and tighten your lock nuts. Check your indicator lights again after cycling your machine a couple of times.
- Correct the adjustment knob corresponding to the light with the delay for about a quarter turn. Cycle your machine and observe the light again.
- Repeat this step again if your problem still persists. Once you fine-tune your machine to perfect synchrony of lights is achieved, lock the locknuts.
- In case your indicator lights worsen on adjustment, put the current knob at the resting position and try the above steps with the other knob.
Conclusion
With all the above troubleshooting methods and ways to resolve simple problems, along with a good amount of knowledge about the possible troubles your machine might face, you will be able to figure out a good way to work out any issue. All this info will help you decide if you will have to repair, replace, or retrofit your Servos electric press brake.